A well-maintained garage is more than just functional—it can boost your home’s curb appeal and increase its value. One of the best upgrades you can make is applying garage floor epoxy coating. This durable, glossy finish not only gives your garage a sleek and polished look but also protects the floor from cracks, stains, and wear over time.
If you’re looking for how to coat garage floor epoxy and achieve professional results without hiring contractors, this step-by-step guide is exactly what you need. Plus, combining this upgrade with services like garage door repair in Rockwall, TX, can transform your garage into a space that’s both stylish and practical.
What Is Epoxy Flooring?

Epoxy flooring is a popular choice for creating a tough and durable surface. Made from resin and hardeners, this coating forms a seamless finish that resists chemicals, abrasions, and heavy impacts. If you’re upgrading your space, learning how to coat garage floor epoxy can be a valuable DIY project for lasting results.
For homeowners seeking professional help, reliable garage door service in Rockwall, TX can complement your newly coated garage floor. Epoxy works well in garages, workshops, and basements, offering both strength and style. With its ability to withstand daily wear, it’s an excellent investment for spaces needing a durable, polished surface.
Benefits of Epoxy Coating for Your Garage Floor
Epoxy offers several advantages that make it an excellent choice for garage floors:
Durability
Epoxy flooring is highly durable and, when applied the right way, can last for 10 years or even longer. This makes it a cost-effective choice for garage floors, offering homeowners a reliable, long-lasting surface that stands up to daily wear and tear.
Resistance
Epoxy flooring resists oil spills, chemical stains, and even minor impacts, making it a great option for garage floors. Its tough surface protects against damage, ensuring your garage floor remains in excellent condition, even in high-traffic or messy environments.
Aesthetic Appeal
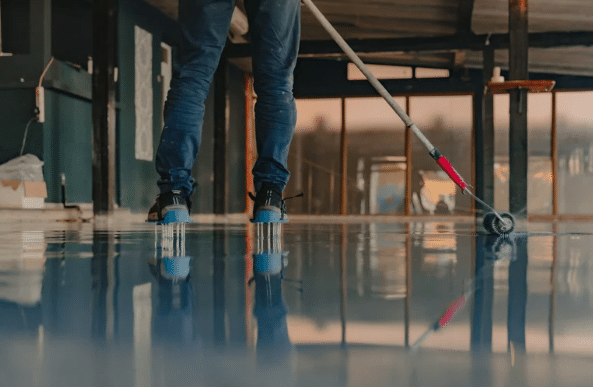
The glossy, high-end finish of epoxy flooring can instantly improve the look of your garage. This visually appealing surface not only adds style but also makes your garage feel more modern and well-maintained, adding a professional touch to the space.
Ease of Maintenance
Epoxy floors are easy to clean and maintain. Whether it’s dust, dirt, or spills, all it takes is simple sweeping or mopping to keep your garage floor looking spotless. This low-maintenance feature makes it perfect for busy homeowners.
Increased Home Value
Adding an epoxy floor to your garage is a great way to increase your home’s value. It creates a durable, modern look that buyers will love. For the best results, combine it with professional garage door installation in Rockwall, TX, to make your garage even more stylish and functional.
Materials and Tools You’ll Need for Your Garage Floor
Before you start, gather the following materials:
- Epoxy Kit: Includes epoxy resin and hardener
- Concrete Cleaner/Etcher: To prepare the floor
- Concrete Patch: For repairing cracks
- Paint Roller and Brushes: For even application
- Masking Tape: To protect walls and edges
- Protective Gear: Gloves, goggles, and a respirator
- Mixing Tools: Buckets and stir sticks
- Floor Scraper and Squeegee: For cleaning and leveling
Steps on How to Coat Your Garage Floor with Epoxy

Let’s dive into the process of coating your garage floor with epoxy.
Step 1: Prepare the Garage
Preparation is crucial to achieving a durable epoxy finish. Follow these steps:
- Clear the Space: Remove everything from the garage, including vehicles, tools, and storage items.
- Inspect the Floor: Look for cracks, stains, or uneven surfaces. Repair cracks with a concrete patch, and allow it to cure for 24 hours.
- Clean Thoroughly: Use a degreaser to remove oil and stains. Follow with a pressure washer or scrub with soap and water.
- Etch the Concrete: Apply a concrete etcher to roughen the surface, allowing the epoxy to adhere properly. Thoroughly rinse the surface and allow it to dry entirely.
Step 2: Protect the Surroundings
Cover the base of your walls with masking tape and lay a drop cloth to catch any drips. Epoxy can be messy, and once it hardens, it’s almost impossible to remove.
Step 3: Mix the Epoxy
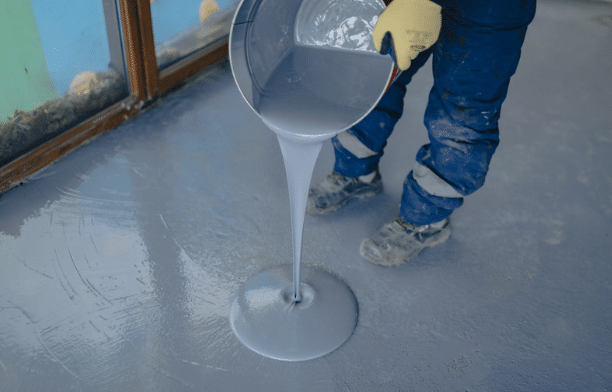
Carefully adhere to the manufacturer’s guidelines when combining the resin and hardener. Most kits require you to combine the two parts and stir them for 3–5 minutes. Use the epoxy within the specified pot life, usually 30–45 minutes.
Step 4: Apply the Epoxy

- Cut In the Edges: Use a small brush to coat edges and corners first.
- Roll the Epoxy: With a paint roller, apply the epoxy in sections. Begin in the corner farthest from the exit and gradually move toward it.
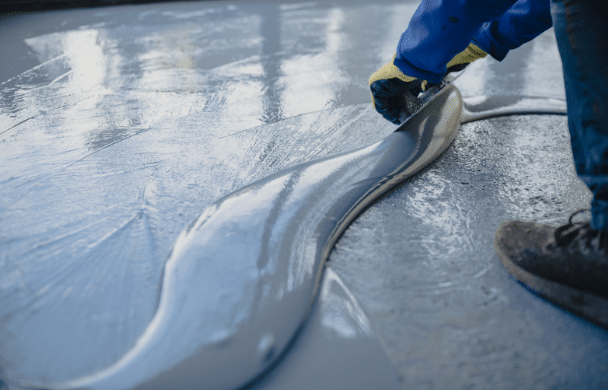
- Spread Evenly: Use a squeegee to spread the epoxy evenly across the surface, avoiding puddles or streaks.
Step 5: Add Decorative Flakes (Optional)
For a professional finish, sprinkle decorative flakes over the wet epoxy. This process improves the appearance while also creating a slip-resistant surface.
Step 6: Apply a Second Coat
Allow the first coat to dry for 12–24 hours, then apply a second layer for added durability and gloss. Repeat the steps of cutting in, rolling, and leveling the surface.
Step 7: Cure the Floor
Epoxy requires curing to harden completely. Avoid walking on the surface for 24–48 hours, and wait up to a week before parking vehicles.
Expert Tips for Perfect Epoxy Flooring
Work Quickly
When working with epoxy flooring for your garage, time is crucial. Once the epoxy is mixed, it starts to harden quickly. Plan your application process, have all tools ready, and apply the epoxy efficiently to achieve a smooth and durable finish.
Control Temperature
Temperature plays a big role in applying epoxy flooring for garages. Ensure your workspace is between 60°F and 80°F for the best results. This temperature range allows the epoxy to cure properly, ensuring a strong bond and a professional-looking garage floor coating.
Avoid Humidity
High humidity can interfere with the application of epoxy flooring in your garage. Excess moisture affects adhesion and curing, leading to a weak or uneven finish. Before starting, check for dry conditions to ensure your epoxy coating bonds perfectly and lasts longer.
Why Pair Epoxy Coating with Garage Door Repair?
Upgrading your garage floor with epoxy can make a big difference, but the overall functionality of your garage also relies on the condition of your door. Learning how to coat garage floor epoxy adds durability and style while ensuring your garage door works smoothly is essential for security and convenience.
If your garage door has squeaks, uneven movement, or insulation problems, it may be time to schedule a garage door repair in Rockwall, TX. A well-maintained door not only enhances your garage’s appearance but also improves its safety and energy efficiency, creating a space that’s both practical and visually appealing.
Maintaining Your Epoxy-Coated Garage Floor
To extend the life of your epoxy floor, follow these maintenance tips:
Clean Spills Promptly
To keep your epoxy garage floor in top condition, clean up oil or chemical spills as soon as they happen. Prompt cleaning prevents staining and ensures the surface maintains its glossy, polished look, extending the life of your garage floor coating.
Sweep Regularly
Sweeping your epoxy flooring regularly is essential for maintaining its shine and preventing dirt buildup. A quick sweep removes dust, debris, and small particles that can dull the glossy finish, helping your garage floor stay clean and attractive.
Avoid Harsh Cleaners
When cleaning epoxy flooring in your garage, avoid abrasive chemicals or harsh cleaners that can damage the surface. Instead, use mild soaps or specialized epoxy-safe cleaning solutions to maintain the durability and shine of your garage floor.
Use Floor Mats
Using floor mats under vehicles is an excellent way to extend the life of your epoxy garage floor. Mats act as a barrier, catching oil drips, water, and debris. This extra layer of protection helps reduce wear and tear, keeping your epoxy floor clean, shiny and well-maintained.
Garage Epoxy Flooring Mistakes You Should Avoid
Skipping Surface Preparation
Failing to prepare the concrete surface properly before applying epoxy can cause major problems, such as peeling or poor adhesion. Always clean the concrete thoroughly and etch it if necessary. Proper preparation ensures your epoxy garage floor coating bonds securely and lasts for many years.
Applying Too Thinly
Applying epoxy in a thin layer reduces its durability and strength, which are key benefits of an epoxy garage floor. A thin coat may not withstand heavy use or impacts. To ensure a long-lasting and resilient surface, apply the epoxy in a thick, even layer.
Ignoring Pot Life
Every epoxy product has a specific working time called pot life. Using epoxy beyond this timeframe can result in uneven application and weak adhesion. For the best results with your epoxy garage floor, work efficiently and apply the epoxy within the recommended pot life to ensure durability.
Cost and Time Needed for Garage Epoxy Flooring
Epoxy flooring is a cost-effective way to improve your garage. For a standard two-car garage, materials usually cost between $150 and $300, making it budget-friendly. The process takes about 2–3 days, including drying time. With epoxy flooring, you get a strong, long-lasting surface that’s easy to maintain and looks great.
FAQs About Coating Your Garage Floor with Epoxy
How Do You Recoat an Epoxy Garage Floor?
To recoat an epoxy garage floor, start by sweeping and mopping the surface to remove all dirt, grease, or debris. Lightly sand the floor to create a rough texture that helps the new epoxy bond better. Then, apply a fresh epoxy coat evenly with a roller, ensuring smooth coverage, and let it cure completely.
How Many Coats of Epoxy Do You Put on a Garage Floor?
Most garage floors need at least two coats of epoxy for durability and an even finish. The first coat seals the floor and acts as a base layer, while the second coat adds strength and a polished look. For additional protection or decoration, you may need a third coat of epoxy.
How Do You Seal an Epoxy Garage Floor?
To seal an epoxy garage floor, use a durable epoxy topcoat or clear polyurethane sealer for protection. Start by cleaning and drying the epoxy surface completely. Apply the sealer evenly using a roller or brush, ensuring all areas are covered. Allow the sealant to dry thoroughly for long-lasting strength and shine.
Can I Epoxy My Garage Floor Myself?
Yes, you can epoxy your garage floor yourself if you follow the proper steps and have the right tools. Clean the floor, repair any cracks, and etch the concrete to help the epoxy adhere better. Apply the epoxy evenly following the manufacturer’s instructions. For best results, consider consulting a professional garage door repair in Rockwall.
What Happens If You Don’t Sand Between Coats of Epoxy?
If you don’t sand between coats of epoxy, the new layer may not stick properly to the existing one. Sanding creates a slightly rough texture that helps the layers bond. Skipping this step can cause peeling or uneven finishes, affecting both the durability and appearance of your epoxy garage floor over time.
Conclusion
Transforming your garage with epoxy flooring is a simple DIY project that adds both beauty and function to your home. By following this guide on how to coat garage floor epoxy, you can achieve professional-looking results without spending too much. Pair this flooring upgrade with reliable garage door repair in Rockwall, TX, to create a garage that’s practical and polished.
Ready to learn how to coat garage floor epoxy and transform your space? Start by gathering the right tools and setting aside a weekend to complete the project. An epoxy floor improves your garage’s durability and resale value. When combined with dependable garage door repair your garage will look fantastic and function perfectly.
End Note
If you’re looking for top-notch garage door repair in Rockwall, TX, BH Doors and Gates has got you covered. Our expert technicians provide reliable, same-day service to get your garage door functioning perfectly. Visit our website to learn more about our services and why we’re the go-to provider in the area.
Curious about our journey and what sets us apart? Check out our story here or explore our range of services on the Garage Door Services page. We’re proud to serve Rockwall and surrounding areas, including Sherman, TX, delivering exceptional garage door solutions every time.
Don’t just take our word for it—read what our satisfied customers have to say on our Testimonials page. Stay informed with garage door tips and updates on our blog. Ready to get started? Contact us today and experience the BH Doors and Gates difference!

